Well I’ve done it, I’ve registered to do the Spartan Beast and the official date for it will be April 29, 2017! Since I have a lot of experience, I’ll share my training and preparation tips for it.
This particular mud run has been on my mind for quite awhile ever since I did the Super a few years back which challenged me like nothing else and this one will be even more difficult that one!
With 5 mud runs that I’ve already completed, 2 of which were Spartan Races, I have the ample information necessary to prepare a strong training regiment for it.

So here is what I am personally doing to become “battle” ready:
Do note that your specific training can totally be different than mine. For this particular race, the 3 things I’ve noticed which are absolutely essential are great cardio, being able to withstand long hikes, especially on your legs and carrying heavy weights.
If you can train your body to be resilient to these 3 challenges, you will be ready for this event. Furthermore, read this article which explains the 10 toughest challenges on this even you need to be ready for and exactly how to prepare for it. If you can do those things with relative ease, you will be prepared for at least 90% of the event.
I’ve just mixed it up my training this time around because circumstances in life kind of pushed me to do the things I’m doing, so I’m making the best of it and helping it prepare me for the Beast.
How I’m getting ready:
1) I am doing at least 10 hours of martial arts trai ning weekly.
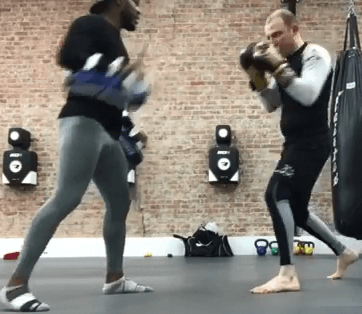 ning weekly.
 I typically fill in those 10 hours on 3 days of hard training and I study several different arts that I believe will be of great help to me once the event day comes.
I actually attribute most of my ability to beat these mud runs to the training I’ve been through in martial arts, but here’s some of the specific classes I’m doing:
Boxing: Great cardio work.
Kickboxing: Even tougher cardio work. I have a personal training who is a champion kick boxer who puts me through some insane ordeals over a period of 1 hour where I literally feel like I want to throw up sometimes, but this intensity is both mentally and physically useful on the event. When I did the Super, having a strong mental game was necessary to push through the insane length of that event.
Brazilian Jiu Jitsu: One art I was not doing in the previous mud runs I’ve done is this one and honestly, it’s been a mistake because a lot of the training in this art deals with exercises that involve you using your body weight to train you.
We wear gi’s and literally practice grabbing other people’s gi collars to control them as well as drag them. This type of body weight exercise mixed in with awesome grip strength training (here’s some more exercises for grip) are making my body a lot more resilient and the grip strength I’ve attained will help me climb ropes, walls and other vertical obstacles.
If you aren’t already doing something like this, I would strongly recommend you take a martial arts class. There’s no need to get into fights, just do things like pad work, bag hitting, and put yourself in a tiring regiment (or have a coach train you if possible).
2) I’m walking up the stairs whenever possible.
I technically live on the 7th floor of my building and whenever I am not too tired, I make sure to try and walk up the stairs as often as possible. If I can do 2-3 walk ups, that equals to 14-21 stories climbed.
The first month I started doing this, I would run out of air and my leg muscles would stiffen and that’s because I sprinted all the way before, but as I kept repeating this regiment, I noticed my resilience to climb the stairs dramatically improved and I found myself sprinting to the top in about 30 seconds, not even realizing I’d already reached my floor many times!
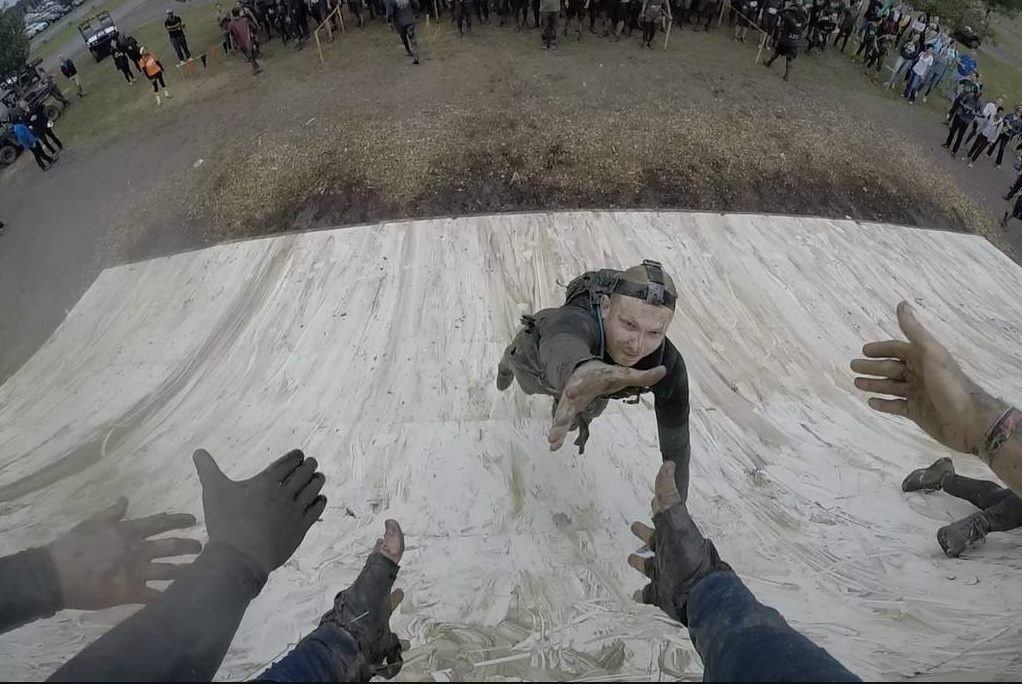
One of the absolute BANES of the Spartan Race is the climb up the mountains they have you do.
In fact, I swear, sometimes I think of the whole event as a scam because so much of it is hiking that you can do yourself, but never the less, it was the single biggest problem I had when I did the event back and my quads were absolutely shot afterwards.
No amount of martial arts training would help me with this, I literally needed to train my quads and knees to hike for long period of time and distances and since I live in the city, and in a building, what better way to do that than climb the stairs?
Now more than ever, I feel confident in the strength my knees and quads have gained from doing something as simple as walking up the stairs instead of taking the elevator and I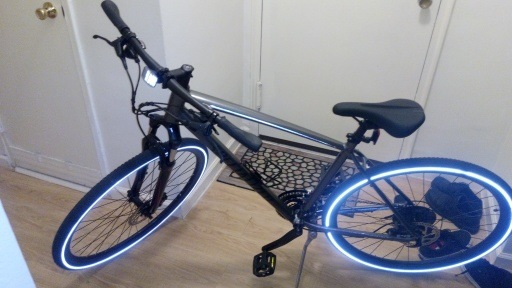 know it will come in handy event day!
3) I purchased a bicycle and try to ride it to places I’d normally take a car, bus or train to:
It literally happened yesterday, I purchased a nearly $700 bicycle.
Yeah it’s a lot, but considering how much money I’d save on gas, it’ll end up being a smart decision for my health and wallet!
But as for it’s uses, well obviously, riding anywhere is already exercise, but the way I look at it is that for things I’d normally take buses, trains and my car to, that would be under 10 miles away, I’ll just bike there whenever the weather makes it possible.
My grandfather lives a mile away from me. I used to take a car or train there, no more, now it’s only a bicycle, it takes me 15 minutes to get there and best of all, since this is a topic on mud runs, bicycle riding is great for the knees and quads, an additional supplemental exercise that will help me climb the stairs better and on the event get up the mountain faster!
If you have a bicycle, use it!
4) I added a strength training regiment to the list.
Carrying weights is a big thing in the Spartan Race and while I hate it, it is necessary to be ready for it. When I go to training, I typically carry about 20-30 pounds of weight on me which is clothing, gear, water and other things.
Carrying that on me for a long period of time helps my body get used to the weight.
In addition, in my martial arts school, one of my lessons involves heavy lifting of barbells, dumbbells, pull ups, and working on my core, all essentials to helping me successfully carry the heavy sadistic props they make you carry on the Spartan Race (sandbags, gravel, tree logs).
I have also started carrying my bicycle up to the 7th floor of my building too.
5) Training on playgrounds (at night so people won’t laugh at me if I fall)!
I did this in preparation for Tough Mudder last year and only had about 2-3 weeks to get ready. What I did was I’d visit a playground when it was empty and basically just go through the monkey bars and other poles to train my grip and resilience in hanging in the air.
I did this about 2-3 times a week, the session only took me about 30 minutes and I was done.
You can literally go wild with this idea and do things like American Ninja Warrior type stuff on the playground where you make up your own obstacle list and have to pass through it.
One thing I’ve done is prepare a course on the playground where I have to only be in the air hanging on no matter what, without dropping once until I make it to a point B I’ve targeted which could be a bar or whatever other prop.
Will this be enough?
I honestly feel far better prepared for this event than I’ve ever been for any previous one I’ve done. Although I’ve been able to pass through ever single course I’ve done so far, the hardest challenge thus far was the Spartan Race and this one will be the longest one yet.
And even on that race, my cardio was fine, but I lacked in the 2 other essential qualifications I listed above: Strength and having strong quads to hike for a long time and this time around, I’ve focused a lot of my training on that.
What I do is obviously a lot, but it’s necessary if I’m to beat this event and do it in a good time. Like I said, read the 10 challenges you need to be ready for and you’ll be pretty much set for this event as well.
For me personally, it just works out that my weekly training just happens to have exercises that benefit me in my training for this event. Once I finish the Beast, I will let everyone know if what I did to prepare was enough or not!
And of course, the same gear I took on my last mud run will be coming with me again 🙂
Until then, bring it on Spartan Beast, bring it on!
If anyone has done the Beast, I would love to know how it was!
Update: Finished the event in excellent condition, the preparation was mostly a success!
For the longevity part of this race (here are details), I was more than ready and finished with more than enough energy to spare. Where I struggled was on some of the obstacles that involved having strong grip.
There were at least 2-3 that were like monkey bars that I could have done better on, but this is a minor part of the event that pales in comparison to the MAIN difficulty I had to go through which was the hiking and having strong resilience and my prep work for that was more than optimal!
I’m glad that hardest part (the bane) of the Spartan Beast which was the long hiking was completed with ease. Those stair climbing exercises really paid off!

 ..
..