Spartan Super Race Review. I Was Not Prepared For This.

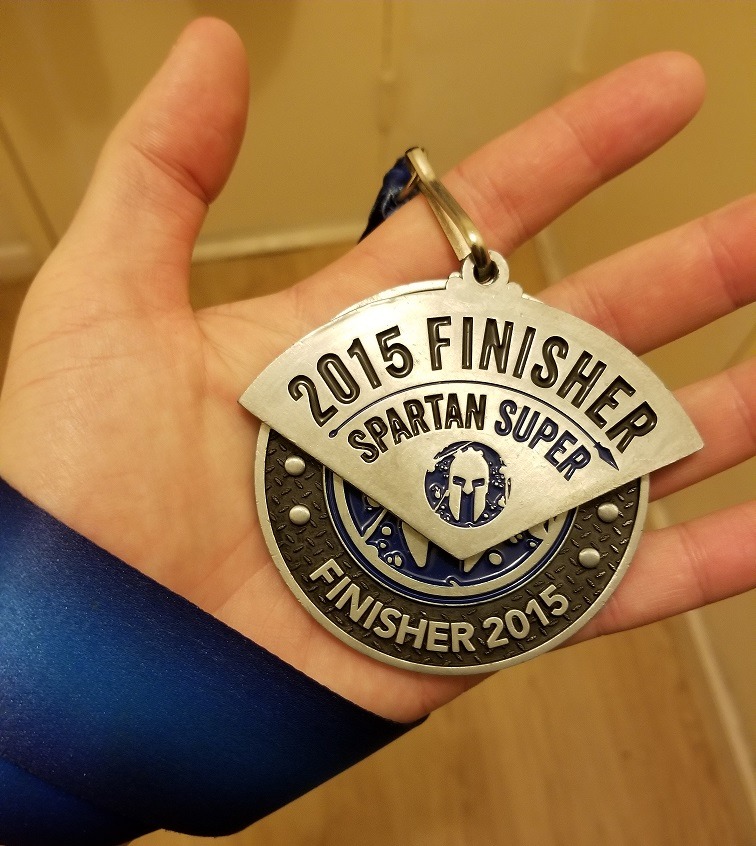
I finished the Spartan Super Race in 2015 and went through all of it’s obstacles. Let me tell you, if you’re not prepared, like I was, do not do it. I barely finished this Race because I greatly underestimated it and I suffered massive consequences including not being able to walk right for several weeks.

I also made some huge errors in wearing the wrong shoes and by a miracle managed to come out without twisting anything.

Let me cover all the details of my Spartan Super experience, help you prepare for one if you decide to try it. This review is going to help you learn from my mistakes!

Let me talk about the insane obstacles on The Spartan Super first…

spartan super race review and obstacles

If you’re wondering why I would take such a tough mud run so lightly, it was because my 3 previous mud run experiences, one of which was a Sprint and 2 other 5 km events, Survival Race and Mud Man X were pretty easy, so I didn’t expect this one to be that different.

The Spartan Super Race is 8 miles long.

When I did it, I was 3 other people and it was on a ski resort called Blue Mountain. I would later find out this specific location had some of the hardest obstacles and overall challenges.

Although there are more than 20 obstacles on the course, the most difficult parts of this race are the:

The uphill walks…

We had to walk almost to the very top of the mountain 3 times. This was the hardest part of the whole event.

My thighs were killing me. So you’d better prepare them because even though this isn’t an official obstacle, you’re going to remember it. When we had to stop, it was because we couldn’t walk up anymore.

When I tell people what to expect on Spartan Races, I tell them that the uphill climbs make up MOST of the event, so practice for them using these tips.

Walking downhill then uphill while carrying weights.

The designers of the Spartan Race basically troll you with this obstacle. No only are you walking and in pain, but they also make you carry weights.

In the event we did, there were 3 obstacles involving weights and taking them down hill, then uphill:

One of the first involved carrying a heavy sandbag that weighted about 30-40 pounds. Carrying it downhill was no problem, but when the terrain suddenly shifted upwards and we had to walk up about 200 feet on what felt like a 70 degree angle, it was torture. I had to stop at least 4 times to take a break.

The next challenge like this took place a few miles after that one. We had to carry pieces of logs the same way (down and then up). They didn’t weigh as much but they were very uncomfortable to carry. There was also someone who dropped one of those logs and they rolled downhill very quickly. That can be deadly if it hits someone.

The last challenge like this was close to the end of the event, after mile 7. We had to take a bucket, fill it with gravel and do the same thing. This one had the easiest slope, but it was also the longest and the weight was much, much heavier, around 50 pounds. You weren’t allowed to carry it on your shoulders, otherwise they’d have you restart it.

The other obstacles you’ll see:

Unfortunately, the Spartan Race (all it’s versions) appears to be the only event whose site doesn’t actually show all of it’s obstacles. Typically most events have a whole list available so you can prepare but in the Spartan Race, most of it is a surprise so I will do my best to describe each area we passed and tips on how we were able to do it.

When we started the event, we had to jump over a few logs. They were about 3 feet above the ground, but you had to roll over them to get over. You won’t be allowed to go around, of under it.

Obviously, the walls. There’s going to be walls you’re going to have to jump to reach the top and then pull yourself upward to get over them. There’s about 5 of them on the course. Some are about 10 feet high, but they do have smaller ones if you’re short.

There were 2 challenges where we had to carry a small, but heavy boulder about 20 feet, drop it, do push ups, pick it up again and bring it back where to it’s spot. The other one had us carrying logs with chains attached to them which we held onto.

There is a challenge where you have to climb about 20 feet on this net looking obstacle, then over on the other side to get down.

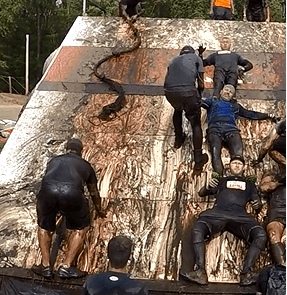
There are a few challenges which aren’t difficult but where it’s easy to slip where you climb a wooden wall that is vertically facing you, then when you get to the top, it slopes diagonally. There are a few others that are shaped like triangles, which you climb from one side, then out the other. There was a metal one with nets we had to go over. That one was about 40 feet high and about 70 feet long.

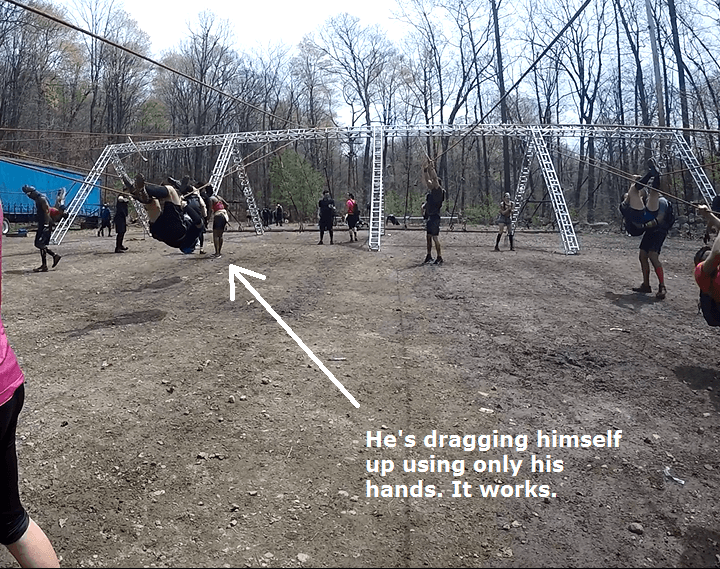
One obstacle had us swing across horizontal poles, but they were in mixed levels where the first pole was higher than the next, then after, it was high again so you were swinging up and down while going horizontally through this area.

There was also a lifting area, where a sandbag was attached to a long rope which stretch about 40-50 feet high. You are supposed to lift the sandbag by pulling on the rope and this part is very difficult. If you drop the sandbag or let go of the rope, you have to restart. I finished this challenge by using my foot to hold onto the parts of the rope I’d pull on, that way if I let go, I still had my foot holding onto the rope and holding the bag.

Of course, there’s always a spear throwing area with Spartan Races. The distance to hit the target is about 20 feet and they do something which makes it a lot harder which is they tie the spear to a rope and have you stand behind a gate to prevent stealing, but when you do this challenge, make sure to pull the rope entirely and then put it over the gate where you’re not allowed.

Then when you throw the spear, you won’t have the rope pulling it back:

spear

Update: Instead of this horrendous picture, I’ve got my own spear throwing photos and techniques here to help you complete it!

There was also several rope climbing challenges.

One was where you have to hang either upside down or over the rope and pull yourself from one metal end to the other and the next was just a regular rope climb. 

That one was about 30 feet high and above very cold and muddy water. The rope was also very wet which made it very slippery. If you have gloves that can help your grip here, wear them. Also if you use a j hook when climbing the rope, it’ll be easier.

Several areas of the event also had a steep hill you had to climb by holding onto a rope and using it to pull yourself up.

Swimming is also a part of this race. We had to swim across a small lake that about 150 feet long. There were inflatable boats in parts of it where you have to dive under them. If you can’t swim, there is an alternative area next to the lake where you just walk through the water.

There is also a monkey bar type obstacle where you have to use rings to swing to the next one. This one was very difficult and it was towards the end of the event.

One balancing area is in this race too, where you have to walk across a wooden pillar that is horizontally above ground but about 2 feet. 

There is also several walls with bumps in them you have to climb on the side of. 

Update: It’s called Z Wall. This part is extremely difficult especially if you do it after a swim because it becomes very slippery. Although the rules of the Spartan Race say you can’t hold onto the top of the walls, I’ve had to do it or else I wouldn’t be able to finish this area. 

The final hard obstacle in this event is a LONG, rocky and muddy area…

Where you have to crawl or spin under barb wires. Spinning is easier to do but you will get dizzy. Crawling is slower but you should wear knee and elbow pads here. 

srt

When training for the Spartan Super Race, train for the length of the race. That is the most difficult. Happy racing!

spartanracefinish

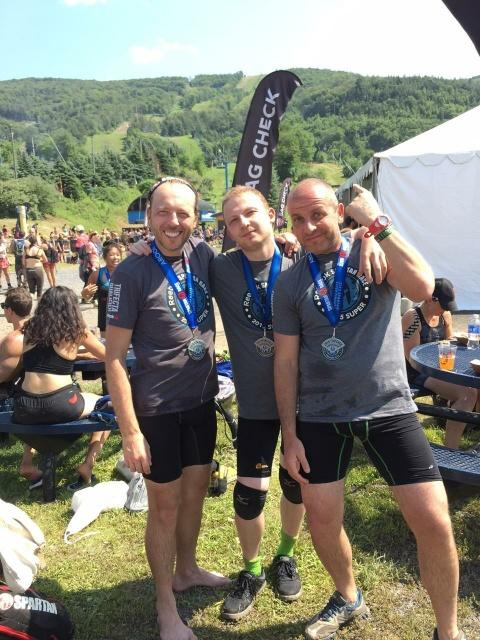
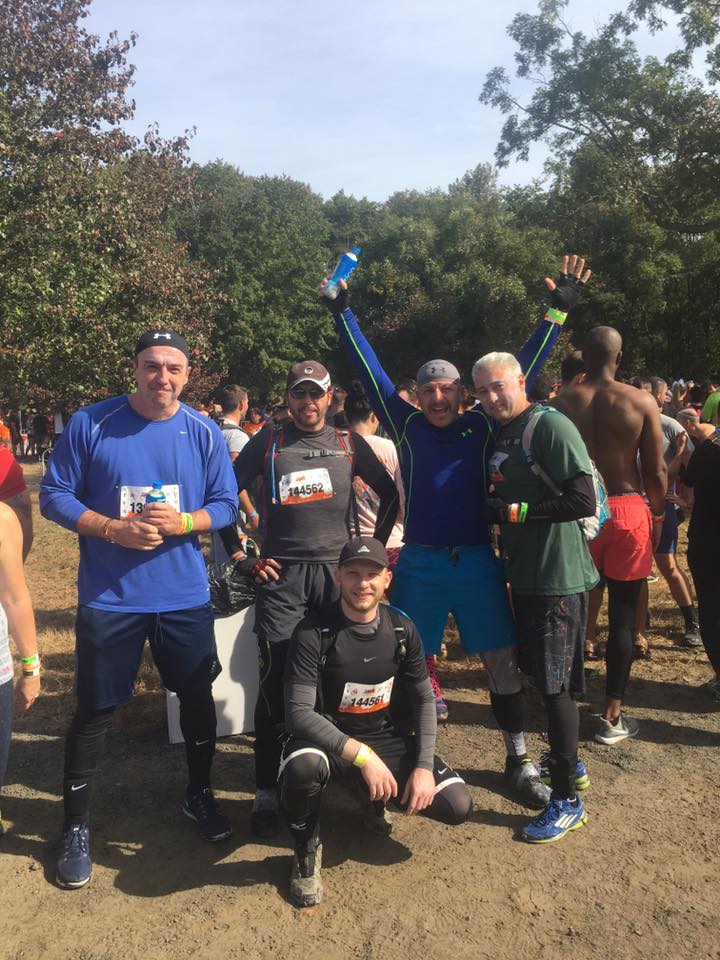
Our finisher photo! If you’ve done of these races, how was it for you? The three of us (plus a new member) recently also did a Tough Mudder. Let me say, it was quite different than the Super!

3 lessons taken from my Spartan Super experience:

1) I wrote really bad sneakers, wear these ones. I fixed that mistake with the next race I did (The Beast) and it truly changed things!

2) Never underestimate a Spartan Race. I stumbled onto the one which was in hindsight known to be hosted in one of the toughest environments.

3) This was the first race where I saw hydration packs being used and for later events, I got myself this one and it made dealing with the hot environment so much better!

Hero 7 Black Review. Bring This Camera on Your Next Mud Run.

GoPro has made action cameras over the years but I’ve been reluctant to recommend any for mud runs since the 5th model. But I am recommending the Hero Black 7.

There’s 4 immediate reasons why, if you’re a mud runner, you will want this camera for your next event:

1) The stabilization is next level. 

Gimbal level quality specifically. In comparison to my last 2 models, the Hero 4 and 5 Black, there was no stabilization on the 4 and very little of it on the 5, being that it was first introduced on the 5th one, but with the latest 7th version, that stabilization is astounding and you may as well consider it gimbal level.

Just imagine running through all the obstacles on your next mud run.

With the previous action camera (at least the ones I’ve had), there was crazy up and down bouncing going on all the time and in fact, I considered that to be acceptable, but with the introduction of gimbal sticks and then that perk being modified on cameras to be available WITHOUT the gimbal being necessary, you will now be able to catch all the stable details of any obstacle you do, on any mud run and let me tell you, that makes watching it later and showing it off to friends that much better, because they’ll be able to see everything, not get dizzy from watching it and who knows, maybe they’ll join on the next event you do (just make sure they are in good shape).

Now add that stabilization in combination with this camera being waterproof and VERY resilient and you’ve got a lot of potential. And in fact, don’t even limit yourself to mud runs when using this, use it for mountain biking, snowboard, jogging through the woods, your name it.

2) The camera quality is very nice.

While I still very much love the quality I get from my 4th and 5th models, let’s be honest, you’re probably not going to be taking many pictures on mud runs, and you’ll probably be using it more for taking videos. Well considering the Hero 7 Black shoots at up to 4K at 60 frames per second, mix in that buttery stabilization and you can capture awesome shots.

For just picture taking purposes, I’d still say you get similar quality from the 4th, 5th and 6th models, but it’s the video quality where the 7th version excels.

3) Less bugs, more action, more fun.

While you have seen me mention owning the 4th and 5th models, you will notice I said nothing about the 6th, and that’s because I didn’t like it.

To date, the 6th model might have been the king of bugs and issues, but the 7th model has so far been minimal in that regard and doing well in having you enjoy it right when you charge up the battery for the first time.

4) Sound quality is great.

Who doesn’t love to hear how people laugh and “woo” on mud run obstacles. While there’s plenty of good action cameras that record sound well, most of them (including old GoPros) “muffle” the sound quite a bit and that’s because the actual microphone is inside the body of the camera and that already makes it harder to hear what’s going on when you’re recording videos.

Don’t get me wrong, you can still fully make out what’s up, but that added muffled effect on everything you’re recording just sucks. 

Well the Hero 7 Black is great at fixing that since the recording of the sound is great, far greater than the previous GoPro’s out there, although my protective side still suggests getting an extra plastic body to protect the already protected camera itself, but that’s your call.

Now I want to make something clear about the 7th model, as there are 3 versions of it:

There’s a silver, white and black version, with the latter being the best. I don’t own the silver and white versions but from what I have seen reviewed, most people are disappointed by them and only like the Black version.

In fact, if you own a 4th, 5th and 6th model, you don’t really have any reason to buy the silver and white versions, and I would say your current models are better, so keep those.

What if I can’t afford the Hero 7 Black?

Currently, the price of this camera is $399, which is actually quite awesome, but still, that’s a few $100 some people may not have.

If picture and video quality are important to you, then even getting a Hero 4 Black should be more than enough for you and I’m the owner of one so I can say that. That one costs about $200, about 2x less than the 7.

And the 5th model which has OK stabilization (just not as good) is a little bit more expensive at $200+, but still FAR cheaper and I’m also the owner of one and am relatively happy with it.

As far as video and picture quality goes, these 2 models are VERY close to each other (see comparison) and in comparison to the 7, it’s also close enough to be tough to tell the difference. 

The only real drawback of those older models is that their stabilization is not on the same level as the 7, so if that’s important for you (and for mud run people who like to document their events, it should be a priority), here’s another option:

Just get it at a Best Buy or Amazon, but finance it.

You can probably knock the $400+ in small monthly payments and pay for it that way if you really want it. I don’t know how many people may have an issue with the $400, considering most mud run events are already pretty expensive just for admission, but who knows, if you have these money problems and REALLY want the 7, again, finance it.

One last option to consider if you can’t afford the 7 is getting a waterproof gimbal for the previous models, at least then, you can basically replicate the same gimbal stabilization you’d get from the 7. Here’s a waterproof one that’s decent, but it’s about $100-$200.

The Hurricane Heat in The Spartan Race Explained.

Not too long ago, the Spartan Race introduced a few new events. One of them is known as the Hurricane Heat and there are 2 different ways you can do it.

This post will show you details on these events, what you need to participate and if it’s even worth doing, so let’s go:

The first is the regular Hurricane Heat (they call it HH) which is far from regular by the way if you know anything about Spartan Races in general. 

In this event you actually compete as a TEAM and have to finish as such. The event can take a whole day and there is actually no time limit in this event. 

Obstacles here are actually unknown to you and the goal of that is to discover them when they are new, as a team, find a way to complete it. While I’ve never done a HH (at least not yet), I have done a few Tough Mudder events and this is very similar to that and speaking from similar experiences, it’s actually a lot of fun to go through these types of events with like minded people who are all willing to help each other. I suspect that the Spartan Race borrowed this idea from Tough Mudder by the way.

When it comes to origins, the way HH was formed was after a Hurricane cancelled one of the events and in spite of that, some of it’s organizers still decided to go through with it and when a lot of people showed up, this eventually led to more similar events taking place, and today we have HH.

So if you enjoy working as a team, have done previous Spartan Race events such as the Spring, Super and Beast, this may be the next challenge for you.

Next up is the 12 hour Hurricane Heat, an “upgrade”:

If you’re a solo type of person, but want the benefits and challenges of running through the regular HH, but without support, then the 12 hour challenge is for you. It’s basically the same exact thing, but you have no team and have to complete everything on your own, in what is basically a 12 hour marathon and arguably tougher than than the Spartan Ultra Beast.

When viewing the official site for this challenge, do note that the organizers strongly advise the right accessories be taken with you since you are going in for a long event. This includes:

1) Proper backpack with FOOD.

Yes, I said food. I assume that this means you won’t get it or drinks or food during the event so you have to rely on yourself. Take my advice in this regard, a multiple time runner through these events and get yourself this backpack, which will help you keep a lot of essentials including food and water and not have to worry about it weighing you down.

Having used that same backpack for multiple events and hikes to this day, it’s long lasting and very convenient to carry around (and again, it’s mud run tested most importantly!).

2) Use good sneakers.

Any multiple time runner through mud runs will tell you that footwear is one of the most important pieces of clothing to have and a lot of people use these sneakers. I’ve run through at least 3 mud runs so far with this SAME pair and it lasts me very long, something you’ll need for your 12 hour HH event. It’ll ensure maximum comfort and safety.

3) Wear light, yet protective clothing.

I would advise comfortable rashguards. We’re talking shirts and leggings. I do not advise that anyone go with minimal clothing to these events. It’s dirty, you can get cut, you will get tired and that is going to lower your immune system, making it likelier to catch something bad. Wearing protective clothing will insulate your body heat, keep your muscles warm and elastic which will allow you to keep moving long term.

Seriously, this is important advice guys. A 12 hour event, likely in the mountains means there’s going to be rapid changes in temperature and especially in the mornings and nights, it will get VERY cold. Keep yourself warm with this mud run clothing, you’ll be happy you did. And don’t forget, you will get wet and dirty, that is just a 100% guarantee with the Spartan Race.

4) Make sure you bring some energy drinks or salts.

Long runs like these are going to make you lose salt through sweat. Replenish it with energy drinks and salt tablets to help the muscles maintain their stability. If you don’t know about this stuff, learn about it here and what else to bring to mud runs, as it’s VERY serious.

Are the HH events worth doing?

You know after having done so many of these mud runs, I’ve got to say that the HH doesn’t really attract me to it. It just seems like another torture event that you pay good money to go through. I’m not against going with a good group of people, but I’ve gotten to the point where I don’t want to pay so much money to get wet and dirty. 

Now that’s my personal though, although I know full well that if I get invited by the same people I usually go with, I’ll probably do it, but more importantly, you need to know that events are nothing to take lightly…

The Spartan Races in general are the hardest mud runs in the industry and these HH events are just another tier up the old events they have created. If you aren’t in shape, if you haven’t done these events before, do not do HH until you are or do the previous ones. You are doing yourself a disservice and if you go with a team unprepared, you are going to weigh them down, believe me.

Make sure you have experience in doing mud runs and are in EXCELLENT shape to do the HH events. Nothing short of these qualifications makes doing these events worth it. They will test you and if you haven’t gone through that mental/physical ordeal before, you will not be able to do this.

Tough Mudder Review. New Obstacles, And a Terrible Accident.

2017 marks the year that I did 2 mud runs: The Spartan Beast and most recently Tough Mudder. While the latter race was much easier than the Beast, I underestimated it and because of that, I almost broke my foot.

In addition to that there were new and familiar obstacles that I had to relearn and change my approach to in order to beat them in the future. Here are my experiences, what I learned, and what you need to take from this so you have a great time.

tough mudder review

1) This was my second Tough Mudder, at the same location.

I originally did this race last year at a racetrack in New Jersey. While I enjoyed the event, I found it to be very easy, so when I was invited to do it again, I expected the same difficulty. 

What ended up happening was that, while the event’s location was the same, the order of obstacles and the way the map was shaped was totally different and in most cases unfamiliar to me. Some new challenges came up…

2) Here were some of the new/same obstacles I went through:

I actually wrote about the new obstacle because Tough Mudder’s site did announce them, but nevertheless going through them was a lot different than reading about them:

Mud mile was different.

Usually, in this challenge, you have “cliffs” of slippery mud to climb and in between is very dirty water. While my first run through this challenge a year ago was easy, the mounds were small and good enough to get a grip on, this time around, it was way harder.

The mounds were higher, more vertical and more slippery. Without having a helping hand, I was not able to climb any of them. Also some of the mounds has breaks in them, meaning if it was underwater and you couldn’t see the breaks, there was a big risk in putting your foot into one of these things and twisting it.

So if you do mud mile, please be very careful and slowly plant your foot down when you step into the dirty water so you can feet the ground and make sure it’s stable and there are no breaks.

Birth canal was awful. 

I really don’t know why they continue to use this obstacle, it has no taste or creativity. You just crawl underneath these bags filled with water. The only difference this year was that I did the “legionnaire” version of it which wasn’t that different, you just crawled through dark bags, but otherwise, the rest was the same, and it was boring.

Augustus Gloop (actually snot rocket).

Ok, this obstacle was cool, and even somewhat scary. This is still a legionnaire challenge (regular one is called Augustus Gloop, but the advanced is Snot Rocket), but I had to dive underneath these barrels, surface with my face up against a cage (there was only enough space for my nose), work my way backwards into a tube, then scale the tube upward and I did it all with my GoPro, so I was basically 1 handed.

I’m not trying to show off, but you should also be able to do this with one hand. This obstacle isn’t really difficult, it is just a little bit scary to dive into the water where you can’t see anything and then climb the tube. And also, there is water falling on you inside that tube. 

augustus gloop obstacle tough mudder

I did enjoy this obstacle.

Pyramid scheme required a minor adjustment.

I posted a strategy on beating the pyramid scheme in Tough Mudder here  tough mudder pyramid schemebut when trying to execute the plan this time around (for the first time), we failed. 

It wasn’t that the idea I had didn’t work, it just required one additional tip. Basically my plan for pyramid scheme was having one person (the strongest) be at the bottom, then have up to 3 other people climb him/her, and stand on each other’s shoulders. 

Then the strongest would make his way up the other 3, then the others would also work their way up, but putting all that energy one the bottom person for so long is incredibly difficult as I had personally found out since I was that person.

While I could have possibly held out with 3 other people standing on me, time was limited and so was my strength, so the ONLY adjustment I would make to my strategy is to have 2 people stand at the bottom, not 1, and then have the other 3 climb the rest. 

The thing is, my team consisted of 6 people so we had to adjust to this, but odds are, you may have other people offer to help you (and use you) to climb up the pyramid, so if you adjust the strategy and have more people at the bottom of it, you’ll have better leverage to hold onto the people on your shoulders. 

None of us could complete Kong because of the long lines…

tough mudder kong obstacle

Kong was actually one of the last obstacles my team and I were looking to do (well just my team since I got injured…). But the problem was so many people were scared to do it and the wait time they had amassed had slowed down the people behind them, so we just elected to skip that obstacle altogether.

There was NO king of the swings! 

I was VERY disappointed as this was my favorite obstacle the first time I did Tough Mudder. I was very much looking forward to flying across the air and hitting the bell. Yet unfortunately, it wasn’t part of the obstacle list this year 🙁

There was literally almost a mile of mud crawling.

One of the sections of the race had us going through a forest, that was “littered” with thick, deep mud. I elected to go around it as much as I could because it stunk bad and it was also very draining. This was not around last year.

tough mudder mud mile

And finally, the accident I suffered on Tough Mudder…

This happened on the “Stage 5 Clinger” obstacle. While climbing the monkey bars, I swung to one of them, slipped and the slip caused me to fall at an angle right on my right foot onto a skinny piece of wooden board, which as I landed on, twisted, made a bad cracking sound and forced me out of the remainder of the race.

tough mudder accident

While there was little of the race remaining, I had to opt out of the next and final obstacle which was electroshock therapy because I could BARELY walk. Luckily, my foot, though swollen and badly hurt was not broken. 

Things I learned:

-What I got absolutely right again was the shoes I recommend people wear and the clothing people wear for these things. They have not failed me yet and I felt very protected.

-Even if you do an event in the same location, do NOT expect the map to be exactly the same, they WILL flip it around, change the obstacle list and adjust/remove certain aspects of it.

-I would exercise a TON of caution on the Stage 5 Clinger. I was extremely unlucky to fall in the way I did, but learning to climb monkey bars better would have prevented that. Please be careful with this one, these challenges sometimes have us think less, act faster and that puts us at bigger risk.

-I consider myself a high level athlete, but accidents can totally happen and looking back at my accident, I can’t believe how lucky I was to fall so badly and come out with a major sprain, not break.

-While I enjoy Tough Mudder more than the Spartan Race, this New Jersey location is one I will not be doing again, because at this point, I feel like I’ve done all I can with this event, at that location. The next one has to be different and more difficult.

– Stretch out at multiple times throughout the race (especially your quads). I didn’t do this last time and had tremendous aches the next day. Because I did not make this mistake on this race, I woke without a single pain in the body, aside from my foot…

– Do not expect professional help from the staff. If you need a bandage, anti bacterial cream, you will not get it on any of the obstacles/water stations. All these people do there is simply call in help to get a truck to carry you to the medical tent that does have it. In short, the staff, if you need help, are pretty useless, so carry your own safety supplies for mud runs when you’re there.

I find this to be extremely ridiculous, risky and lazy on the part of the Tough Mudder organizers, yet easily correctable. So fix this Tough Mudder people. 

An Easy Way to do Tyrolean Traverse on The Spartan Race.

tyrolean traverse spartan race

So I have done the Tyrolean Traverse twice now and both times, I ended up doing it in a way that I felt was easier than the official method that was shown to me by experts who do the Spartan Race.

For some reason I felt this method I’ll explain is much easier to execute for beginners. 

This is what the Tyrolean Traverse looks like in a Spartan Race:

tyrolean traverse spartan race

It’s an obstacle on the Spartan Race where you hang upside down and pull yourself from one end of the rope to the other. The rope (it could be a thick wire actually) is attached to 2 props that keep it in place so it doesn’t rip. 

Now “officially” the method by which most experts recommend “traversing” this obstacle is by hanging upside down, just like most people would at the start (there’s also a version where you can hang on top of the rope with one foot down and drag yourself over it). 

However, the thing they recommend is pulling yourself with your hands one on top of the other and using your feet as well and having your feet cross over one another each time your hands pull you up. Think of a sloth climbing a tree branch horizontally, speed it up and you have yourself the recommended strategy for the Tyrolean Traverse.

Now I have to mention it because I do think there will be people who will benefit from it and will be able to do it. But I just couldn’t…

After finishing my Spartan Super in 2015, and doing that obstacle for the first time, I though I had it figured it, but when I saw the strategy I just explained on doing it, not only did I not do it the way it was suggested, but coming into my next event which was the Spartan Beast about a month ago, I felt like I could pull of the suggested strategy.

However…

After trying it out and failing again, I reverted back to the original method I used in 2015 and that’s what I’ll explain here. I honestly think it’s a lot easier in that it doesn’t require such graceful technique as the experts version does.

In fact, from my own viewpoint, I saw a BUNCH of other competitors try out the expert version and fail. Most of them really ended up either failing because they spent too much time hanging on the rope, trying to figure out the technique and others just ended up doing it in one way or another like I did.

There’s just a graceful technique that requires lots of practice to pull it off. But because I was tired, and not fully prepared for it, I decided to just do it the way I originally did.

So here is my super basic technique for handling this obstacle:

Hang upside down like any normal person would on this thing.

Cross your legs so one is on top of the other. I find this gives you a better grasp on the rope and there’s less chances of falling.

Just use your hands to pull yourself up, in a “heave ho” manner. Use both hands at the same time because it’ll be easier to pull yourself up.

Just use that method until you reach the end and hit the bell (I forgot to mention, there’s a bell you have to whack to signify that you passed the obstacle). 

the wrong way to do a tyrolean traverse

Recommended safety suggestions: 

The worst thing that came happen from doing this obstacle and “my” method of it is that your legs can get rope burn from the friction. 

To avoid this, simply wear some sort of leggings, socks or protection so that tears against the rope and not your skin. 

If you are the crazy type of person who enjoys running these events without proper clothing (there’s a lot of dangers in that), just wear knee pads

When you get to the Tyrolean Traverse, let the knee pads hang down so they are by your sneakers. You’ll find that when you wrap your legs around the rope, the area where the rope will touch your legs will be the same area that knee pad is on, so that will protect you from the friction. Here’s great mud run clothing tips.

Additionally, what helped me out was wearing baseball gloves. It sounds crazy but these things have a rubbery material on the palm that makes things like rope climbing and pulling so much easier. Of course, you will need to have great grip as well. 

There is strength required for the Tyrolean Traverse, so prepare accordingly:

If you’re good with any sort of upper body training, you should be perfectly fine on this obstacle. If not, start training for it by rope climbing, doing pull ups and similar upper body exercises.

One thing I mentioned that I did in preparation for the Spartan Race was I practiced a lot of Jiu Jitsu which is a martial art. One thing we do to improve our hand strength and grip is that we lay down on the floor (on the stomach) and use only our hands to drag ourselves across the floor. 

This is an incredible workout that really helped me out during the Spartan Race. Of course if you don’t do martial arts, there’s ways you can mimic this type of working.

One thing that may work for you is lying down on your own floor and using your palms to drag your body across it. You’ll find that your hand strength will increase a lot after you do this a couple of times.

Not only will this type of workout prepare you for the Tyrolean Traverse (which honestly isn’t that hard of an obstacle), but it will also improve your body’s resilience to the other obstacles you’ll encounter on the Spartan Race.

I’m absolutely sure there’s going to be experts who do this obstacle that will tell me the official version with using their legs is the best way to go and honestly, I’m still looking to try it.

It does save energy and does make it easier to traverse this thing, but honestly, it requires in my opinion a lot of technique which if you don’t have the time to practice or an area to practice it, you should probably rely on my more beginner friendly technique.